TFS Remake
VCS Integration | Plugin
  • TFVC
  • REST
  • IntelliJ target: 2022.3
  • Java 11

TFS for JetBrains IntelliJ IDEA

TFS Remake brings the legacy JetBrains TFS plugin forward for IntelliJ IDEA. It keeps the familiar TFS menus and workflows, then makes the everyday pain points easier: history, diffs, single-file updates, and rollback.

A practical bridge for teams still on TFVC

TFS Remake keeps the workflow people already use, replaces fragile old parts step by step.

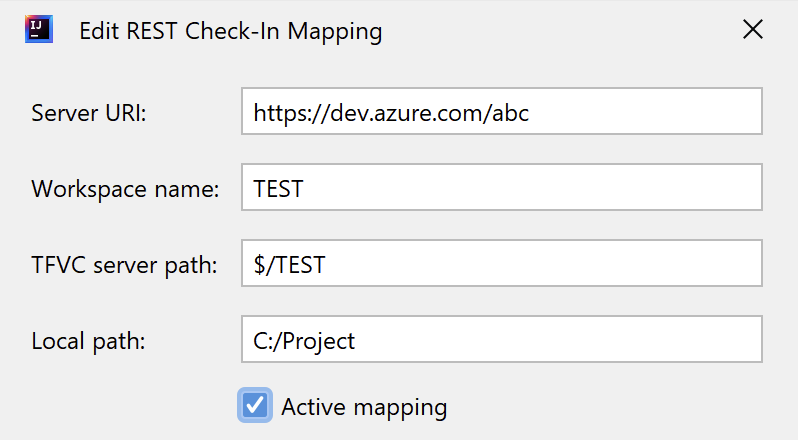
  • Keep the TFS workflow you know

    Menus, Local Changes, Repository, Show History, Annotate, comparisons, and labels stay in the same mental model.

  • Use newer calls

    History, changeset comment rename, rollback, and supported work-item reads use REST.

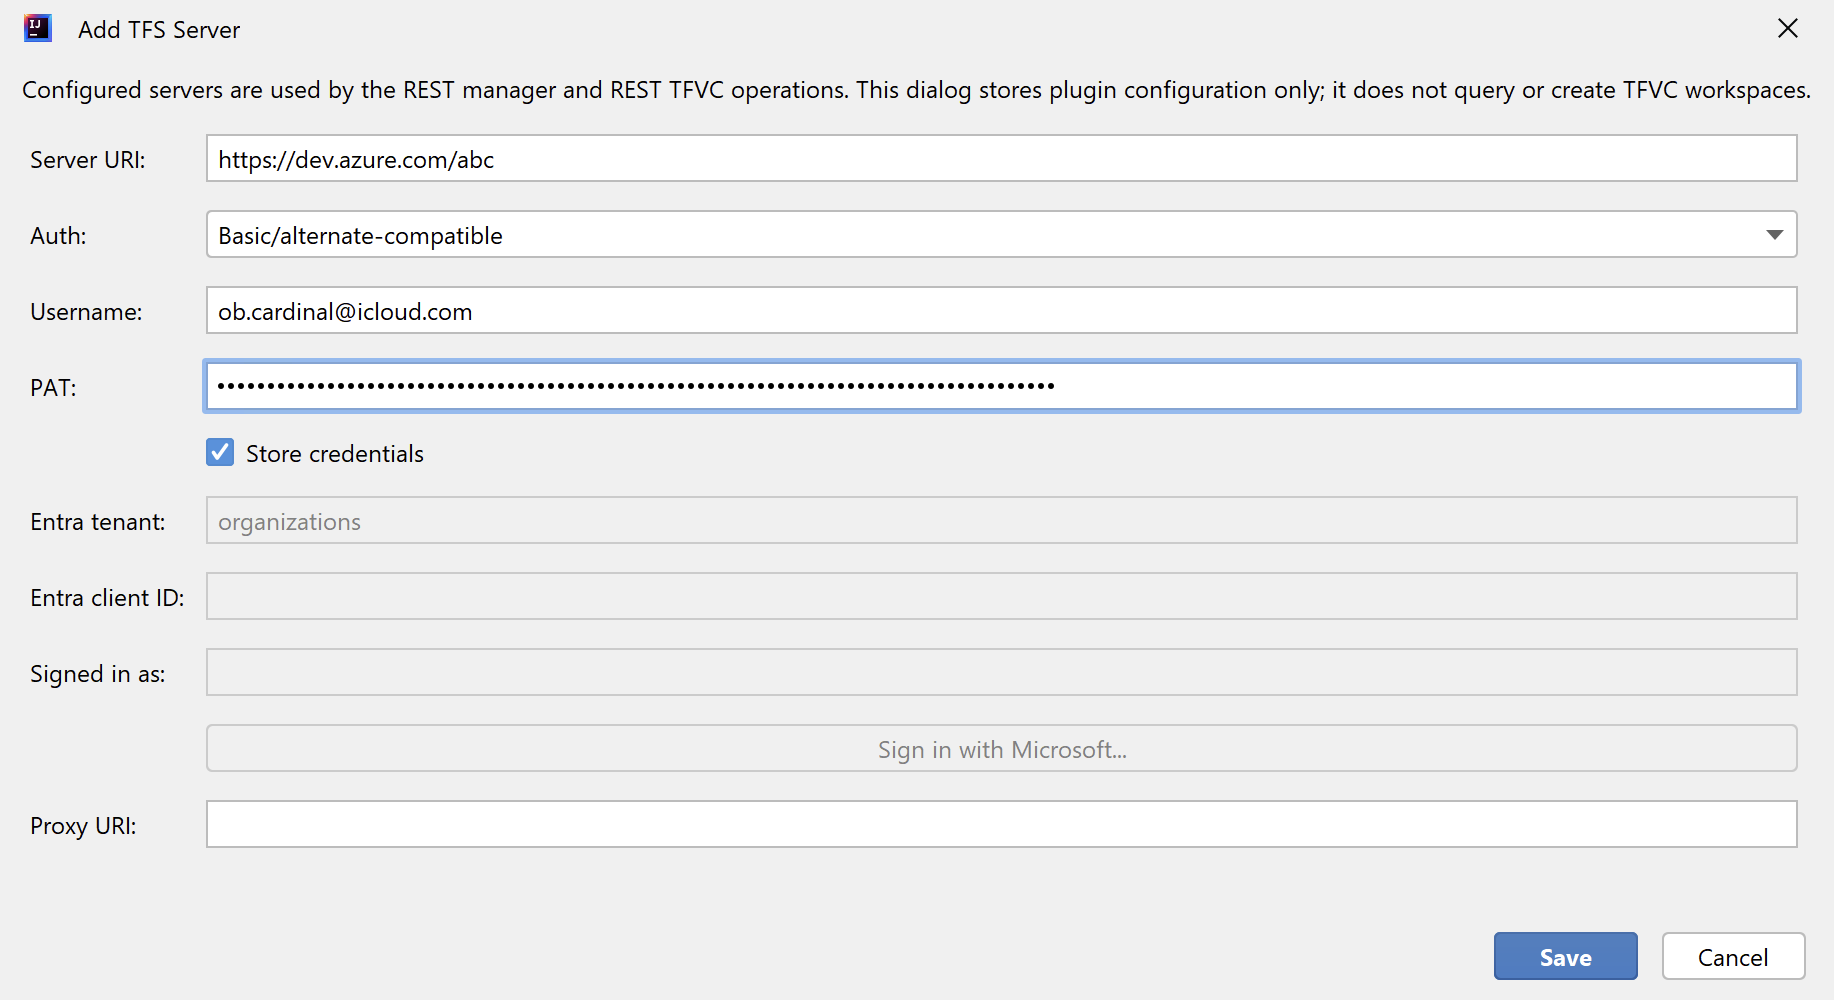
  • Move secrets out of tfs.xml

    Saved PATs and passwords move to IntelliJ Password Safe when available. New tfs.xml saves keep only non-secret settings and a stored-credential marker.

What changed

The remake keeps the old JetBrains TFS workflow, but makes the parts people touch most feel more predictable.

  • Repository opens with recent history.

    Open the Repository tab and it starts loading a fresh page. Scroll down for older changes; file lists load when a changeset is selected.

  • Show History is easier to inspect.

    Select a revision to see the files changed in that changeset, then choose a file to open the inline diff preview.

  • Local Changes repeats less work.

    Status data is indexed and reused where possible, so large local trees feel less noisy during refresh.

  • Updates are more deliberate.

    Update Project follows known changed paths and skips files that are already current. Update File from TFS... targets exactly one mapped file.

  • Rollback and comments are explicit.

    Review a rollback locally or create a server rollback changeset through REST. Changeset comments can be edited from the menu.

  • Incoming is replaced by simpler signals.

    Use Repository history and single-file update notifications instead of IntelliJ's standard Incoming view.

How to setup

The plugin needs two kinds of configuration: a server row with REST credentials, and a project-local mapping that tells the plugin which TFVC path belongs to which local folder.

  1. Choose the authentication path

    Use one of these branches before saving the server row.

    Basic/alternate-compatible with PAT

    • Create the PAT: in Azure DevOps, open your organization, go to user settings, choose Personal access tokens, then create a new token.
    • Token setup: give it a name, choose the organization, set an expiration, and select Full access so the plugin flow is not blocked by a missing scope.
    • Plugin fields: choose Auth: Basic/alternate-compatible, fill Username, paste the token into PAT, and keep Store credentials checked. Copy the PAT when Azure DevOps shows it; it will not be shown again.

    Microsoft Entra SSO/MFA

    • Plugin fields: choose Auth: Microsoft Entra SSO/MFA, keep Entra tenant as organizations or enter your tenant ID, then enter the Entra client ID.
    • Sign in: click Sign in with Microsoft..., finish the browser device-code flow, and confirm that Signed in as is populated.
    • No PAT here: this branch uses Microsoft Entra tokens for REST calls. MFA and conditional access happen in Microsoft's sign-in flow.
  2. Add the server row
    • Server URI: enter the Azure DevOps organization or TFS collection URI.
    • Proxy URI: leave empty unless this workstation needs a proxy. If used, enter only the proxy URI with scheme and host.
    • Save: this stores plugin configuration. It does not create TFVC workspaces and does not run a checkout or update.
    Step 2 Add the server row dialog with server URI, authentication choice, credential fields, and proxy URI
  3. Add the explicit mapping
    • Server URI: use the same server row URI.
    • Workspace name: enter the real existing TFVC workspace name, not a friendly label.
    • TFVC server path: enter the mapped server root, starting with $/.
    • Local path: enter the absolute local folder that matches that TFVC root, for example the mapped modules/configuration folder.
    • Active mapping: keep it checked. This records project-local mapping data only; it does not create, update, discover, or delete server workspaces.
    Step 3 explicit mapping dialog with server URI, workspace name, TFVC server path, local path, and active mapping checkbox
  4. Confirm the configuration
    • Open TFS -> Edit Configuration... and check the server row, auth mode, stored credential status, proxy status, and explicit mapping count.
    • Use Test REST connection to verify that the saved REST credentials can call TFVC REST. A 401 means authentication failed; a 403 means the account reached the server but lacks permission.
  5. Map the IDE directory
    • Open IntelliJ Settings -> Version Control -> Directory Mappings.
    • Add the same local root used in the explicit mapping and choose TFS as the VCS.
    • This IDE mapping is still required; the explicit REST mapping does not mark files as under TFS by itself.

When the old flow gets stuck

Browse history, inspect changed files, open diffs, update one mapped file, edit a changeset comment, or rollback a selected changeset without leaving IntelliJ IDEA.